Welcome to Into Indie Games’ walkthrough for the Demo of Fretless – The Wrath of Riffson.
It’s a rhythm RPG game developed by Ritual Studios, where you play as Rob on a quest to become a rockstar. This walkthrough covers the entirety of the Demo, along with all the collectibles that you can pick up on the journey.
For more information on Fretless – The Wrath of Riffson beyond this walkthrough, be sure to check out the official website here.
Finding Doctor Strum

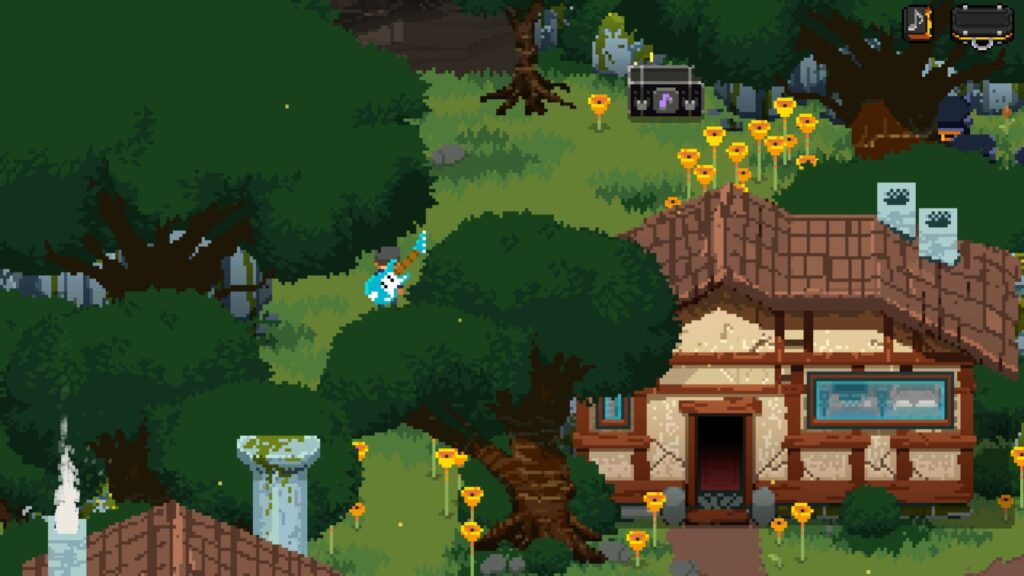
After Rob picks up his guitar, step outside the house. Your first objective is to find Doctor Strum, who’s located just to the west. Before that, go left and up through the trees to find a Supply Chest. Loot it to find 100 Gold Picks.

Now, take the right path from your house to trigger a conversation with Doctor Strum. Partway through your conversation, a Percushroom will interrupt, triggering your first battle.

Follow the on-screen tutorial to defeat it. Once the encounter is over, loot the nearby supply chest to collect two Health Potions. Doctor Strum will suggest you find the Guitar Builder next.
Find the Guitar Builder

Head south, past the Davie504 NPC, to enter Songwood Forest. Continue along the path, and you’ll be ambushed by two Percushrooms. This fight introduces you to the passive effects of your equipped instruments.

Use what you’ve learned so far to defeat them, then keep heading south to reach Whibblespoon’s House.

Here, you’ll meet Whibblespoon, the fabled Guitar Builder, who gives you your first Mod, Ceramic Pickup. Mods are powerful upgrades that you can equip on your instruments for different effects. Use the nearby workbench to install the mod.
Before leaving, be sure to check the Supply Chest near Whibblespoon to grab a Shield Potion.
Songwood Forest Part 1

From Whibblespoon’s Hideout, go south into the main section of Songwood Forest. Shortly after entering, you’ll get a phone call from Doctor Strum. Once the conversation ends, move ahead until you reach a fork in the path.


The right path is currently blocked, so head left to find a supply chest containing a Health Potion.

Go down to encounter a Steelshroom. After defeating it, continue forward and take on two more Percushrooms.

Keep moving and you’ll come across a lever. Interact with it to open a nearby gate.

A short cutscene will play, where you’ll see a Riff Statue. You’ll walk up to it and unlock three new riffs for your Acoustic Guitar.

From the Riff Statue, take the path left through the two large trees to find a supply chest containing 100 Gold Picks, this game’s main currency. Then return to the statue and head right past the signpost, where you’ll face a tougher fight against two Percushrooms and a Steelshroom. Defeat them and continue along the path to reach the next part of the forest.


You’ll stumble upon some SMR Goons mid-conversation. They’ll spot you and trigger a battle with an SMR Bassist. During this fight, you’ll unlock Crescendo, a powerful ability that can deal massive damage if you manage to hit the rhythm inputs properly.

After winning, you’ll be rewarded with the Screamer Pedal. Check the note lying nearby for a bit of extra story, then head south to move deeper into Songwood Forest.
Songwood Forest Part 2

Follow the forest trail and soon you’ll come across Backpacker Benny. Talk to him, then continue down the road to find another Guitar Workbench. The path above is blocked for now, so take the path down and to the right.

In the narrow corridor ahead, you’ll face two Percushrooms and an SMR Bassist. Defeat them to earn Upgrade Materials, which you can use at the workbench to enhance your riffs. Upgrade Tab Shot now to boost its damage.

Keep going forward and cross the wooden bridge. Another group of enemies is waiting ahead. Take them out and then follow the path to the left across a second wooden bridge. You’ll spot some Fretboard Oil on a tree nearby.


Pick it up, then return to the area where you fought the enemies and head north. Defeat the enemies here and move forward to arrive at a wide clearing.

Loot the supply chest above to get a Health Potion, then speak to the two NPCs hanging around near the giant Guitar Statue. From here, go down and to the right to find another supply chest containing a Shield Potion. Just below this area is a lever that unlocks a shortcut leading back to the Guitar Workbench from earlier.

The lever also opens a locked door nearby. Inside, you’ll find a supply chest containing 100 Coins, but more importantly, the Silver Strings, a new mod that you can use on your Acoustic.
Solving The Frog Rhythm Puzzle


After collecting the Silver Strings, head back to the giant Guitar Statue and go east. Sneak past the enemies for now and continue downward to collect another batch of Fretboard Oil. Once you’ve grabbed it, double back and deal with the enemies you avoided.


Now head up and take the road marked with a frog signpost. This path leads to a simple rhythm puzzle. Watch the arrow that pops up as the frog sings, then match the input in time with the rhythm bar at the top. Solving the puzzle rewards you with the Clip-On Tuner Mod for your Acoustic Guitar.

Return to the previous section and follow the path heading upward. There’s a supply chest ahead containing two Health Potions. Move forward and you’ll come across a lever. Interact with it to unlock two new paths. The path below loops back to the starting area of Songwood Forest, while the upper path leads to a new zone called Dissonant Thicket.
Unlocking a New Instrument

As soon as you take your first steps into Dissonant Thicket, Doctor Strum calls you again. He wants you to come back to his lab in Harmony Heights. You can use the newly unlocked Fast Travel option to quickly head back.

After a cutscene, Doctor Strum hands you a new instrument, the Bass. This instrument has a whole new set of Riffs and a different mechanic that revolves around building up your Slap meter to deal massive damage to your enemies.
At this point, the NPCs around Harmony Heights have already set up shops. Take some time to explore the village and pick up any mods or items you want for your journey. Once ready, open up the map and Fast Travel back to Dissonant Thicket to continue your journey.
Dissonant Thicket

The first area of Dissonant Thicket has a workbench where you can use any newly acquired Mods on your instruments. Take the right path past the signpost. You’ll find a merchant NPC that sells several upgrade materials for your instruments, including a Slap Stone, the main component to upgrade Bass Riffs.

Move past the NPC to encounter a new type of enemy called the Speaker Spider. What makes these enemies dangerous is that they can apply a debuff effect called Echo, which will drain your health at the end of your turn. Defeat the monster and move forward to encounter another enemy type called Sonic Bat.

Loot the tree trunk afterward to collect a batch of Slap Stone. Move north to head deeper into Dissonant Thicket.

Keep heading north to fight another Speaker Spider. Defeating it rewards you with some more upgrade materials. Collect Luther’s Dog Toy lying on the ground.

Double back and head east to find a strange altar with three stone blocks of different colors. Just above, you’ll see another set of colored blocks. The goal here is to match the stone blocks below to the colors above. Interact with each block to align the colors and unlock the path forward.
Warning: This will lead to an optional boss arena. You don’t have to fight the boss to progress the story.
How to Beat AUX Arachnid

Aux Arachnid will be the first true boss you’ve faced up to this point, and it’s a tough enemy to beat. But his moveset is relatively straightforward:
- Main Attack: It has a basic three-part attack that you can block. It will first jump and attack from above. It follows up with two bite attacks.
- Echo Debuff: Aux Arachnid charges up and applies three Echo debuffs.
- Shield: It charges up and gains 35 Shield. You can steal it or use attacks that ignore the enemy shield.
- Summon Minions: When its health drops about halfway, the Aux Arachnid summons two Speaker Spiders to fight and retreats from the battlefield. You’ll have to defeat both for the boss to reappear.

Defeating the boss is all about managing your Crescendo meter and health. Use your Health potions to heal up and try to remove the debuffs as quickly as possible. The boss has only one direct damage attack. So even though the fight seems tough because of its massive health pool, you can whittle it down easily if you manage to hit your QTE inputs.

Once defeated, you can unlock a new Pedal called Memory Child that charges your Crescendo meter with each successful input during a Crescendo Riff.
Shortcut Back to Harmony Heights

After defeating the AUX Arachnid, go back to the area with the altar and continue west. Go between the tree trunk and keep heading right.

There’s a hidden path below through the trees that will lead to a supply chest. But you’ll have to fight three Sonic Bats to get to it. The Supply Chest contains some more Gold Picks and the Fretwrap Mod for Bass.

Get back to the main path and defeat the Speaker Spider and Sonic Bat that come up next. Collect the Slap Stones from the tree trunk nearby. To the left, there’s another group of enemies that you’ll have to defeat afterward.

Keep Heading North to come out the other side of Dissonant Thicket. Go left past the bridge to find a Supply Chest containing a Jazz Pickup and a Crescendo Potion. Interact with the Rope nearby to unlock a shortcut back to Harmony Heights.

Take the Rope to go down to the village. Next to the Youngster Hades NPC dancing near the greenhouse, you’ll find a yellow dog. Interact with it to give it the Larry’s Chew Toy you picked up earlier. He will move out of the way, and you can grab the Riff Statue to unlock three new Riffs for your Bass.
Use the instrument workbench in Harmony Heights to make any final adjustments, and then head back up the Rope that you used to climb in. You’re heading into the final boss encounter for the Demo.
How to Beat SMR Larry

After climbing back up, head west. You’ll find SMR Larry blocking your path to Dropdee beach. After a brief cutscene, the boss battle begins. If you managed to beat AUX Arachnid, this one shouldn’t be too difficult. Make sure you time your blocks properly, as each missed block gives the boss more damage.
- Main Attack: SMR Larry dashes around with his Keytar and attacks you four times in quick succession.
- Echo Debuff: Similar to the optional boss from earlier, he has an Echo attack that fills up your debuff bar. You’ll have to get rid of the debuff as soon as possible to avoid taking unnecessary damage.
- Gain Shield: He also has a shield buff that gives him 75 Shield. If you’re using the Bass, you can steal the shield or use riffs that ignore the enemy shield to give yourself an edge.
- Self Healing: Another one of his moves will restore his health. He will use it once you manage to drop his health down to around 300.
- Crescendo: Once his HP drops a decent bit, SMR Larry will pull out his own Crescendo attack. You’ll need to input the directional buttons in time to negate as much damage as possible.

Use your health and shield potions wisely and try to build up your Crescendo meter to take out the boss. Once the fight ends, Doctor Strum will call you once again revealing some major plot points for the story. This is where the Demo ends.
Thank you for reading the Into Indie Games walkthrough for Fretless – The Wrath of Riffson demo. Walkthorughs for other parts can be found here.
For more on indie games, be sure to check out the links below!